Where the Fizz Comes From:
Pine soda relies on just a few simple components: dechlorinated water, a sugar source, fresh pine needles, and yeast. The interaction between these ingredients drives fermentation. Yeast is a microscopic organism found naturally on plant surfaces and throughout the environment. When it encounters water and sugar, it becomes metabolically active and begins converting those sugars into carbon dioxide and organic acids. In pine soda, this process is used to develop flavour and carbonation rather than alcohol.
This fermentation unfolds in two stages. During primary fermentation, yeast is active in the jar, building flavour and releasing carbon dioxide into the liquid. During secondary fermentation, the soda is transferred to a sealed bottle, where the carbon dioxide is trapped, creating the gentle carbonation that gives pine soda its fizz.
There are a few ways to introduce yeast into pine soda, each offering a different balance of predictability, speed, and flavour control.
- Wild yeast (on the needles) produces the most place-specific results but tends to ferment more slowly and unpredictably. Readers interested in deeper wild yeast practices may wish to explore the work of Sandor Katz.
- A ginger bug offers greater consistency and introduces a subtle ginger note, making it a good middle ground between wild fermentation and commercial yeast.
- Champagne yeast, a commercial strain of Saccharomyces cerevisiae, is fast and highly reliable, producing consistent carbonation with minimal flavour contribution.
This guide uses champagne yeast, which allows the pine to remain the dominant note while providing predictable, repeatable results when used according to package instructions.
Forage and Flavour:

_1_(39411252702).jpg)

Late winter is the best time to collect eastern white pine needles for soda. At this time of year, the needles contain higher levels of soluble sugars that help protect them against freezing temperatures and prepare for spring growth. These sugars also give the soda a brighter, less bitter flavour. In addition, the tree is less resinous in late winter, making twigs and needles less sticky and easier to harvest compared to other times of the year.
Before harvesting, make sure you’re able to confidently identify an eastern white pine tree. When foraging, choose healthy, flexible needles from clean areas and harvest lightly, taking only a small handful per tree. Fresh pine forms the base of this recipe, but small amounts of dried or frozen ingredients can add depth, even if they make the soda slightly cloudier.
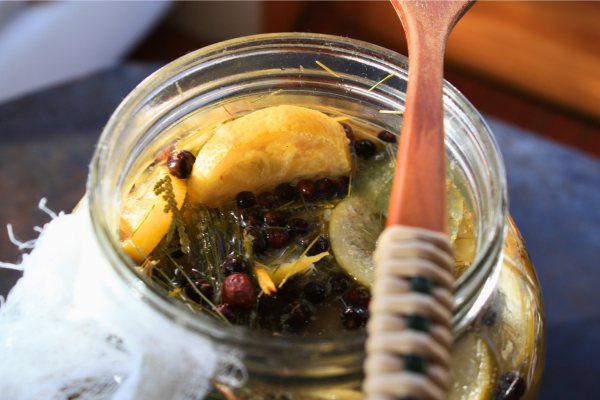
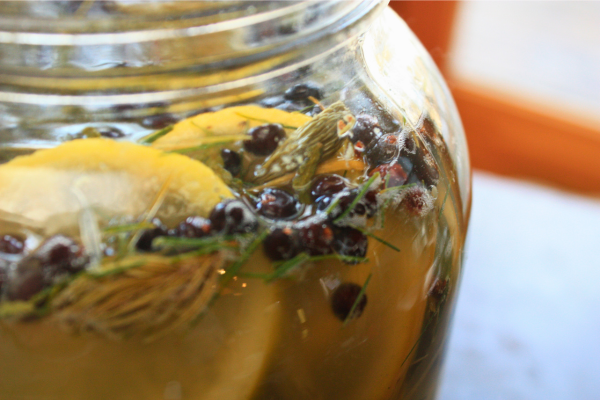
Pine pairs especially well with subtle additions such as:
- Thin strips of lemon or lime peel
- A small piece of ginger
- Dried sumac berries
- Frozen serviceberries or blueberries
Now that the process is clear, it’s time to gather the necessary ingredients and prepare for fermentation.
Step One: Materials and Ratios

You’ll need:
- A sterilized one-gallon glass jar
- A cheesecloth or a clean cloth with an elastic band
- A wooden spoon or a clean utensil for stirring
- A strainer
- Sterilized swing-top bottles for secondary fermentation and carbonation
- Measuring cups
For a one-gallon (about four-litre) batch, use:
- 15–16 cups of dechlorinated water*
- 3/4 to one cup fresh, clean pine needles and twigs, and any optional flavourful plant additions
- 1/2 to 3/4 cup raw honey, or 1/3 to 1/2 cup white sugar
- Champagne yeast: a very small pinch (about 1/8 tsp), or as directed on the package.
* Because chlorine can inhibit fermentation, use dechlorinated water by boiling tap water for 20 minutes and letting it cool, or leaving it uncovered overnight.
Step Two: Primary Fermentation

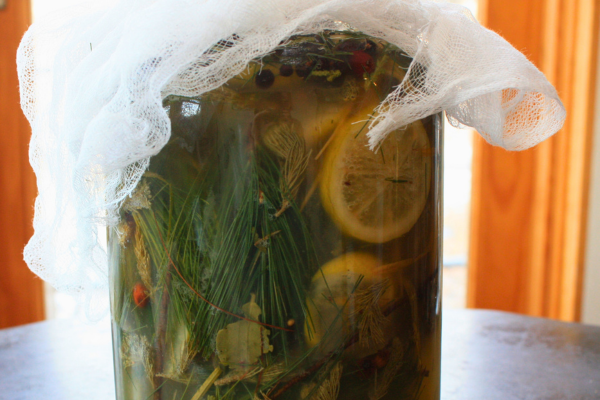
Primary fermentation is where flavour develops and fermentation begins. Roughly trim plant materials to release their aromatic compounds and loosely pack them into the jar with the water, yeast and sugar, leaving a little headspace. Once the ingredients are combined in the jar, cover it with cheesecloth secured with an elastic band and set it at room temperature, out of direct sunlight. Stir twice daily, and over the next two to four days, fermentation will begin quietly as the yeast becomes active.
As this stage progresses, you’ll notice subtle but reliable signs that fermentation is underway:
- Small bubbles clinging to the sides of the jar, especially after stirring
- A fresh, lightly tangy aroma replacing the initial sweetness
- A gentle fizz or slight prickling on the tongue when tasted
Primary fermentation is complete when the soda shows gentle activity without becoming overly acidic. If the soda smells clean, tastes balanced rather than sweet, and shows visible bubbles, it’s ready to move on to bottling. If the soda has a strong unpleasant scent or smells off, discard it and start again.


Step Three: Secondary Fermentation
Secondary fermentation is where the brunt of carbonation develops. Once primary fermentation is complete, strain the soda to remove plant material, then transfer the liquid to sterilized swing-top bottles. If primary fermentation was slow or the soda tastes quite dry at this stage, you can add ½ tsp of sugar per bottle to help ensure carbonation. Seal the bottles and return them to room temperature, out of direct sunlight.
Over the next one to three days, carbon dioxide produced by the yeast becomes trapped inside the sealed bottles, creating even more fizz.
Signs that carbonation is developing include:
- a soft hiss when the bottle is briefly opened to check pressure
- visible bubbles rising when the bottle is opened
- increased resistance when opening the swing-top closure
It’s important to check bottles daily and gently “burp” them by opening the top slightly to release pressure. This helps prevent over-carbonation. Once the soda reaches the level of fizz you enjoy, move the bottles to the refrigerator. Cold temperatures slow fermentation and help stabilize carbonation.
When chilled, pine soda is best enjoyed within seven to ten days. Open bottles slowly and carefully and enjoy well-chilled.


As winter shifts toward spring, pine soda provides a small, seasonal way to work with local trees at home. To extend that connection further into spring planting, visit LEAF’s Planting Program Homeowners page or explore our Shrubs, Cedars and Pawpaws page.
Amba is the Residential Planting Program Assistant at LEAF, supporting residential native tree and shrub planting programs. She brings a background in developing recipes with seasonal, local ingredients and in leading hands-on workshops focused on home fermentation and place-based food practices, with a particular interest in helping people explore edible native species around them.
LEAF offers a subsidized Backyard Tree Planting Program for private property. The program is supported by the City of Toronto, the Regional Municipality of York, the City of Markham, the Town of Newmarket, the City of Vaughan, the Regional Municipality of Durham, the Town of Ajax, the Municipality of Clarington, the City of Oshawa, the City of Pickering, the Township of Scugog and the Town of Whitby.