
Few trees are as misunderstood as the native black walnut (Juglans nigra). In urban areas, this tree may be considered “messy” because of its large fruit (walnuts), or “unfriendly” because it produces a chemical called juglone that inhibits the growth of some plants. Although these same characteristics are desirable in the right spaces, such as large yards, parks or naturalized areas, such negative perceptions have come to overshadow the tree’s many benefits.
For example, the black walnut’s distinctive, wide canopy shapes the character of old neighbourhoods, while its rich, dark hardwood is highly prized in woodworking. In addition, those same “messy” walnuts are packed with protein, making them a highly valuable food source for wildlife and a nutritious snack for people.
And inside every walnut lies something else: a deep, earthy pigment that has coloured pages for centuries!
Creating black walnut ink turns autumn’s castoffs into something both creative and rewarding. This simple, low-waste project invites us to see this tree in a different light and celebrate a species that gives more than most people realize.
What You'll Need:
-
Protective gear: rubber gloves, old clothes and an apron
-
Non-reactive stainless steel or enamel pot (avoid aluminum)
-
Heat source: a stovetop or, preferably, an outdoor canner burner or propane burner
-
Water
-
Stirring utensil: a long-handled wooden spoon or dedicated stirring stick you don’t mind staining
-
Strainers and filters: a metal colander plus a fine filter such as an old T-shirt, cheesecloth or coffee filter
-
Large, non-reactive bowl
-
Newspaper or an old tablecloth: to protect your work surface from staining
-
Popsicle sticks or scrap paper
-
Glass jars or bottles with lids
-
Optional additives: gum arabic, vodka or isopropyl alcohol, whole cloves, glycerin and iron acetate

Harvesting the Tree’s Offerings:
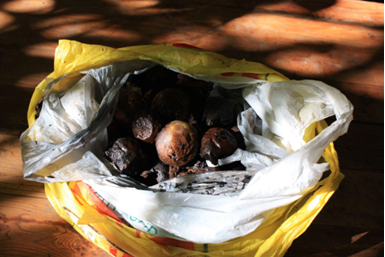
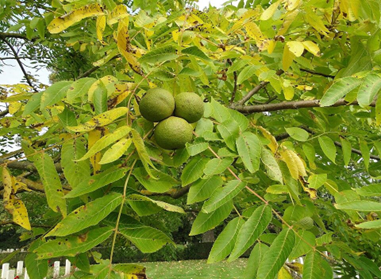
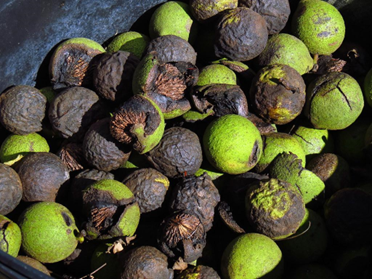
In Southern Ontario, walnuts typically fall from late September through October, which is the ideal time to collect hulls for ink. You’ll need roughly 25–30 fallen walnuts for one small batch of ink.
The first step, of course, is making sure you’ve correctly identified a black walnut (Juglans nigra) tree! Use a trusted tree ID guidebook, local field guide or reputable online resource if you’re unsure.
Look for nuts that have dropped to the ground. Hulls that are just beginning to break down release the richest pigment for ink-making — these are starting to darken and give slightly when pressed, but still hold their shape. Hulls that are rock hard are under-ripe, while mushy, collapsing or foul-smelling hulls are past their prime and tend to produce a muddy colour. A little surface mould is common and can be rinsed away.
A few important things to keep in mind:
only collect walnuts from trees you have permission to forage from
avoid collecting walnuts from the roadside as vehicle pollutants may contaminate the walnuts
be sure to leave plenty of walnuts behind for wildlife
begin your ink-making process within a few days while the hulls are still supple and full of colour
Getting the Hulls Ready:
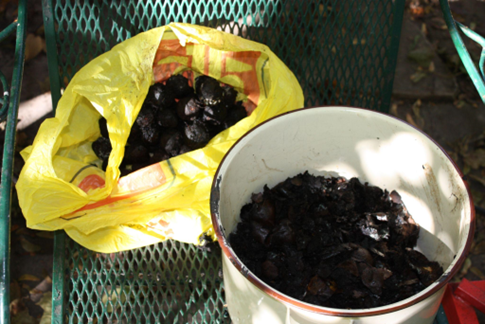
Once you’ve collected your walnuts, be sure to put on gloves before you dive into the rest of the process, as the pigment in the hulls will stain your hands.
Use your hands or a dull knife to peel away the outer hulls and then set them into a non-reactive pot or bowl. The inner nuts are not part of the ink process, but you can either process them separately for eating, following proper guidelines, or simply leave them for the squirrels, who depend on these food sources.
Once the hulls are separated, you can move on to simmering and extraction.
Extracting the Pigment:
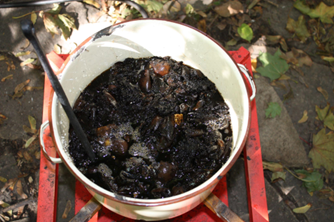
Simmering is best done outdoors, as the mixture has a strong, lingering smell. Place the hulls in a non-reactive pot and cover them with enough water to fully submerge them. Bring the pot to a boil, then reduce the heat to a steady simmer for at least three hours, stirring occasionally. You can test the liquid as it cooks by dipping a popsicle stick or scrap of paper into the mixture to check the developing colour. Once you are satisfied with the depth and tone, the extract is ready to be strained.
Straining and Refining:
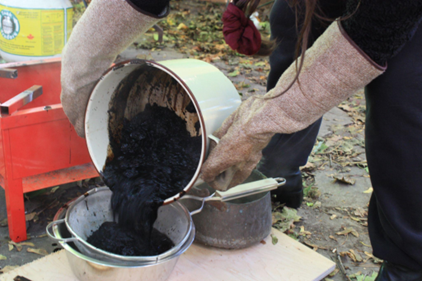
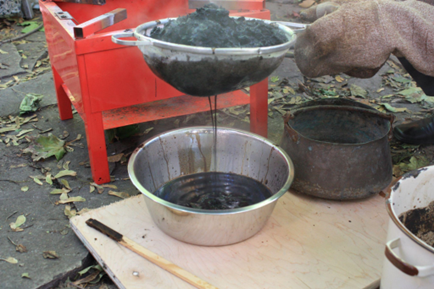
First Strain:
Once the simmering stage is complete, carefully pour the hot mixture through a sturdy colander set over a large non-reactive bowl. This first strain separates the liquid from the boiled hull material. Let the mixture drain fully — the hulls hold a surprising amount of extract! You can also press them gently with a spoon to help release more extract, but avoid squeezing too firmly, as this can push grit through.
Additional Strains:
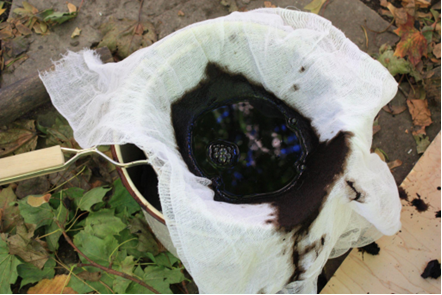
Next, filter the liquid again through a piece of cheesecloth or an old T-shirt. This second step removes fine plant sediment, helping to produce a smoother ink that stores better and performs more consistently with dip pens. You may need to repeat this step a few times to remove all the fine sediment.
Reducing the Extract
For a stronger, more concentrated colour, return the strained liquid to a clean pot and reduce it over low heat. Once the tone looks right to you, remove it from the heat and allow it to cool.
Disposal and Clean-up:
Allow the boiled hull material to cool before handling. Hull debris can then go into the green bin or a dedicated compost area (one that doesn’t feed into garden beds containing plants sensitive to juglone). Be sure to wipe down your pots, strainers and work surface promptly, as the extract stains quickly! Once the liquid is fully strained, filtered and reduced, it is ready for bottling and any optional additives.
Finishing Touches and Optional Additives:
Now that the extract has cooled, pour it into clean glass jars or bottles (a funnel can help avoid spills). If you plan to use the ink with dip pens, you can add a small amount of gum arabic to improve flow and smoothness. To help the ink last longer, add either a few whole cloves or a splash of vodka or isopropyl alcohol as a preservative.
Label your jars with the date and any additives you used. To maximize its shelf life, store the finished ink in the refrigerator or keep it in a cool, dark place.
Using Iron Acetate to Darken the Ink
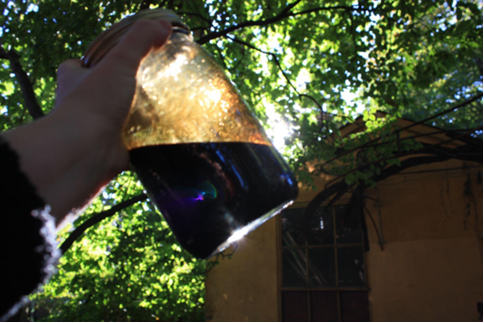
Iron acetate can significantly darken walnut ink. Prepare it by soaking clean steel wool in white vinegar for several days and straining off the liquid. Gradually add it to a test portion of your ink, as too much can overwhelm the tone. Be sure to rinse metal nibs thoroughly after use, as iron acetate can corrode them over time.
Bringing Your Ink to Life:
Black walnut ink works well with dip pens, paintbrushes and bamboo pens. It is not recommended for fountain pens, as natural sediment can clog the feed. For drawing and painting, use the ink full strength for deep browns or dilute it for lighter washes. Its transparency allows you to build gentle layers, much like sepia watercolour. Try mixing both diluted and concentrated tones in one piece for subtle value shifts.
On absorbent papers, the ink dries quickly and permanently. Acid-free watercolour or mixed-media paper works best. You can also experiment with effects:
Salt crystals sprinkled on wet areas create organic-looking blooms
Bleach lightly lifts highlights. Use a diluted mix and good ventilation
Graphite underdrawings glow softly beneath translucent walnut washes
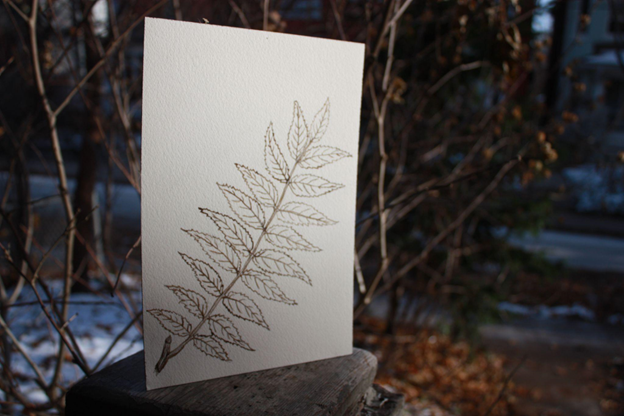
Making your own walnut ink opens up a world of earthy, expressive colour that feels different from anything store-bought. Each batch draws its character from the tree itself, as well as the season, so no two jars ever look quite the same. Working with fallen hulls also highlights how easily overlooked materials can become something meaningful when we pause to use what nature provides. When you sit down to sketch or journal with your new ink, that whole process comes with you, and a small part of autumn settles onto the page.
Get Started with LEAF
Explore native plant options for your garden, including black walnut, with LEAF’s Backyard Tree Planting Program. Visit our Homeowners page or check out our Shrubs, Cedars and Pawpaws page to learn more and begin your planting — and ink-making — journey!
Amba works as the Residential Planting Assistant at LEAF. She is passionate about hands-on, place-based projects and enjoys turning seasonal materials into projects that bring people closer to the trees in their neighbourhoods.
LEAF offers a subsidized Backyard Tree Planting Program for private property. The program is supported by the City of Toronto, the Regional Municipality of York, the City of Markham, the Town of Newmarket, the City of Vaughan, the Regional Municipality of Durham, the Town of Ajax, the Municipality of Clarington, the City of Oshawa, the City of Pickering, the Township of Scugog and the Town of Whitby.